iDEAL via Brite Payments
iDEAL is an online payment method that enables consumers to pay online through their own bank. It is only available in the Netherlands, where it is the most widely used e-commerce payment method.

The integration consists of 4 main aspects:
- Display iDEAL in your checkout
- Create a session for the payment
POST /api/merchant.authorizePOST /api/session.create_ideal_payment - Render the client on the front-end
<script>new Brite([token])</script> - Handle session notifications
POST [callbacks[...].url]POST /api/session.get
As such there are a few, but key differences between our regular product and the iDEAL via Brite product.
- A new API endpoint
/api/session.create_ideal_paymenthas been introduced - iDEAL payments are only available in the Netherlands, therefore restricting
country_idtonlandcurrency_idtoeurand a new API endpoint has been introduced. - Customers authenticate only via their bank and thus there is no returning user concept on Brite’s side. When creating a new iDEAL payment no
customer_idis required. - Refunds / Payouts must be handled using Brites Payout functionality with the bank details, which are shared from iDEAL.
Make sure you have read the “Before your start” information
1. Display iDEAL in your Checkout
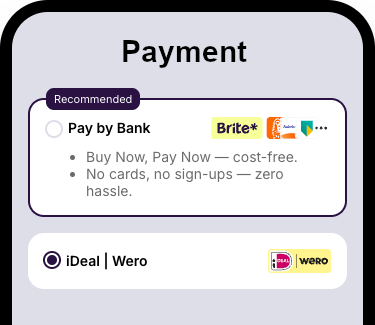
iDEAL must be presented as its own payment method, even if you also offer Brite Instant Payments.
iDEAL has their own brand guidelines that need to be followed, both in the checkout and if you include their name or logo elsewhere.
2. Create a session for the payment
Merchant authorisation
POST /api/merchant.authorize
access_token which you add to your requests to the Brite APIs. Request to create a iDEAL session
POST /api/session.create_ideal_payment
					POST /api/session.create_ideal_payment HTTP/1.1
Host: sandbox.britepaymentgroup.com
Content-Type: application/json
Authorization: Bearer <YOUR_ACCESS_TOKEN>
{
  "amount": 99.98,
  "brand_name": "Your website",
  "merchant_reference": "ORD12345ABC", // Your order ID
  "country_id": "nl",
  "locale": "nl",
  "currency_id": "eur",
  "redirect_uri": "https://merchant.com/payment?order_id=ORD-12345-ABC",
  "callbacks": [
	{
  	"url": "https://merchant.com/callback/?order_id=ORD12345ABC&state=aborted",
  	"session_state": 10 // STATE_ABORTED
	},
	{
  	"url": "https://merchant.com/callback/?order_id=ORD12345ABC&state=failed",
  	"session_state": 11 // STATE_FAILED
	},
	{
  	"url": "https://merchant.com/callback/?order_id=ORD12345ABC&state=aborted",
  	"transaction_state": 2 // STATE_ABORTED
	},
	{
  	"url": "https://merchant.com/callback/?order_id=ORD12345ABC&state=failed",
  	"transaction_state": 3 // STATE_FAILED
	},
	{
  	"url": "https://merchant.com/callback/?order_id=ORD12345ABC&state=completed",
  	"transaction_state": 4 // STATE_COMPLETED
	},
	{
  	"url": "https://merchant.com/callback/?order_id=ORD12345ABC&state=aborted",
  	"transaction_state": 5 // STATE_CREDIT
	},
	{
  	"url": "https://merchant.com/callback/?order_id=ORD12345ABC&state=completed",
  	"transaction_state": 7 // STATE_DEBIT
	}
  ]
}
For additional information on any of these fields please refer to the API documentation
amount
The amount to transfer from the customer.
merchant_reference is stored in the Brite system and helps you to search or relate the payment based on ids from your system. callbacks
It is crucial to subscribe to the callbacks to know how to process the order in your system. Please read more about that in the section “Handle session and transaction callbacks” further down below.
Response to the create payment request
					{
	"url": "https://sandbox.britepaymentgroup.com/eyJ0Ij...jTAwZDU9",
	"token": "eyJob3N0IjogImh0dHBzOi8vc2FuZGJveC5icmXBheW1l....J9",
	"id": "ag9ofmFib25lYS0xNzYyMTNyEQsSA1Nlc3Npb24Y0p6R0AEM"
}
token) and the hosted integration (url) as well as the session id. url
The URL opens the Brite’s hosted payment page.
token
The token to initiate the Brite client on the front-end. It should be shared with the client in a secure way.
Share the token with your client
The token is meant to be shared with your client (front-end). There you should use the client.js and create a new instance of new Brite('eyJ...').
More: https://docs.britepayments.com/technical-documentation/rendering-the-brite-client/
id
The id of the session. You can choose to store the id from this response, however, you will get the respective notifications and with those you should also be able to associate the respective orders in your system with Brite’s session.
3. Render the client on the front-end
Embedded integration
The embedded integration allows your customers to complete the payment within the checkout experience in your site. In some cases, they might need to complete certain steps of the payment authentication and authorization in their online banking, however, they will get back to your site before completing the payment.
token field from the response to create a new instance of the Brite client that will start the session flow.
<script>new Brite([token])</script>
The Brite client will handle all required steps the customer needs to go through. Once those are completed, you will receive an event on the front-end that will close the client and allow you to continue to payment flow.
For integration of the Brite client see https://docs.britepayments.com/technical-documentation/rendering-the-brite-client/
Hosted integration
The hosted integration allows you to redirect the customer to a Brite hosted payment page. The customer completes all required steps there until they either abort, fail or complete the payment.
After creating the payment session you can use the url field from the response to redirect your customers to a new window/tab. Please note that this url is not to be rendered inside an iframe. At the end of the flow Brite redirects the customer to the redirect_uri that you provided as part of the session creation request.
4. Handle session and transaction callbacks
					POST [callbacks[...].url]
POST /api/session.get
|
State
|
Session state name
|
What to do?
|
|---|---|---|
|
10
|
STATE_ABORTED
|
Return to the payment selection view.
|
|
11
|
STATE_FAILED
|
Return to the payment selection view.
|
|
12
|
STATE_COMPLETED
|
Store relevant details and continue with the transaction_id
|
- 1
|
State
|
Session state name
|
What to do?
|
|---|---|---|
|
2
|
STATE_ABORTED
|
Return to the payment selection view.
|
|
3
|
STATE_FAILED
|
Return to the payment selection view.
|
|
4
|
STATE_COMPLETED
|
Confirm the order / purchase to the customer.
|
|
5
|
STATE_CREDIT
|
Ship goods / credit the player.
|
|
6
|
STATE_SETTLED
|
Money arrived. Ship goods / credit the player.
|
|
7
|
STATE_DEBIT
|
Reach out to the customer to pay again.
|
- 1
For more details see https://docs.britepayments.com/technical-documentation/integrate-callback-handling/
For the full list of callback states see the following documentation:
Transaction states
https://docs.britepayments.com/technical-documentation/in-depth-knowledge-transaction-states/
Session states
https://docs.britepayments.com/technical-documentation/in-depth-knowledge-session-states/
5. Payout / Refund
transaction_id or bank_account_id.
					POST /api/transaction.create_refund
POST /api/transaction.create_withdrawal
For more information on refunds see https://docs.britepayments.com/technical-documentation/integrate-instant-payments/#5-refund-a-payment.
For more information on payouts see https://docs.britepayments.com/technical-documentation/integrate-instant-payouts/#step-3-initiate-a-payout .
Testing your integration
|
amount
|
scenario
|
iDEAL PaymentStatus
|
Brite SessionState
|
|---|---|---|---|
|
1.00
|
The payment has been successful
|
SettlementCompleted
|
COMPLETED (12)
|
|
2.00
|
The payment has been cancelled during the flow
|
Cancelled
|
ABORTED (10)
|
|
3.00
|
The session for the payment has expired
|
Expired
|
ABORTED (10)
|
|
4.00
|
The payment session is still ongoing and will be aborted after 20 min.
|
Open
|
TRANSACTION_APPROVAL _STARTED (8)
|
|
5.00
|
Some unspecified error has occurred
|
Error
|
ABORTED (10)
|
|
6.00
|
Some unspecified error has occurred
|
Error
|
FAILED (11)
|
- 1