
Here we highlight some parameters. For a full list of all parameters check out the API reference.
brand_name
The brand name is visible to the customer when using Brite Payments. You should choose a recognisable and relatable brand name here for a better experience. Note that even though there is no character limitation, Brite will show 31 characters in the smallest version of the client.

Importance of Customer Data
When making a payment providing accurate customer details (customer_firstname, customer_lastname, customer_dob, customer_email, customer_address) is crucial for every request as it would improve the customer experience & conversion during the payment process.
Ensure you collect and provide the most accurate and complete customer information available.
deeplink_redirect - recommended for mobile apps
When the customer returns from their mobile banking app or online banking, a Brite web application is opened to handle the returning customer. Note that this is particularly the case on mobile devices. Immediately after that Brite opens the link provided in deeplink_redirect. This way, the customer is basically redirected from their bank to the deeplink_redirect. The link should point to the view in your mobile app or web page on which the customer can continue the payment process using Brite.
You should add any relevant ids to the URL so that you can identify the respective purchase/order in your system.
Example for mobile apps: myapp://open?screen=checkout&order_id=ORD-12345-AB
Example for web pages: https://merchant.com/checkout?order_id=ORD-12345-AB
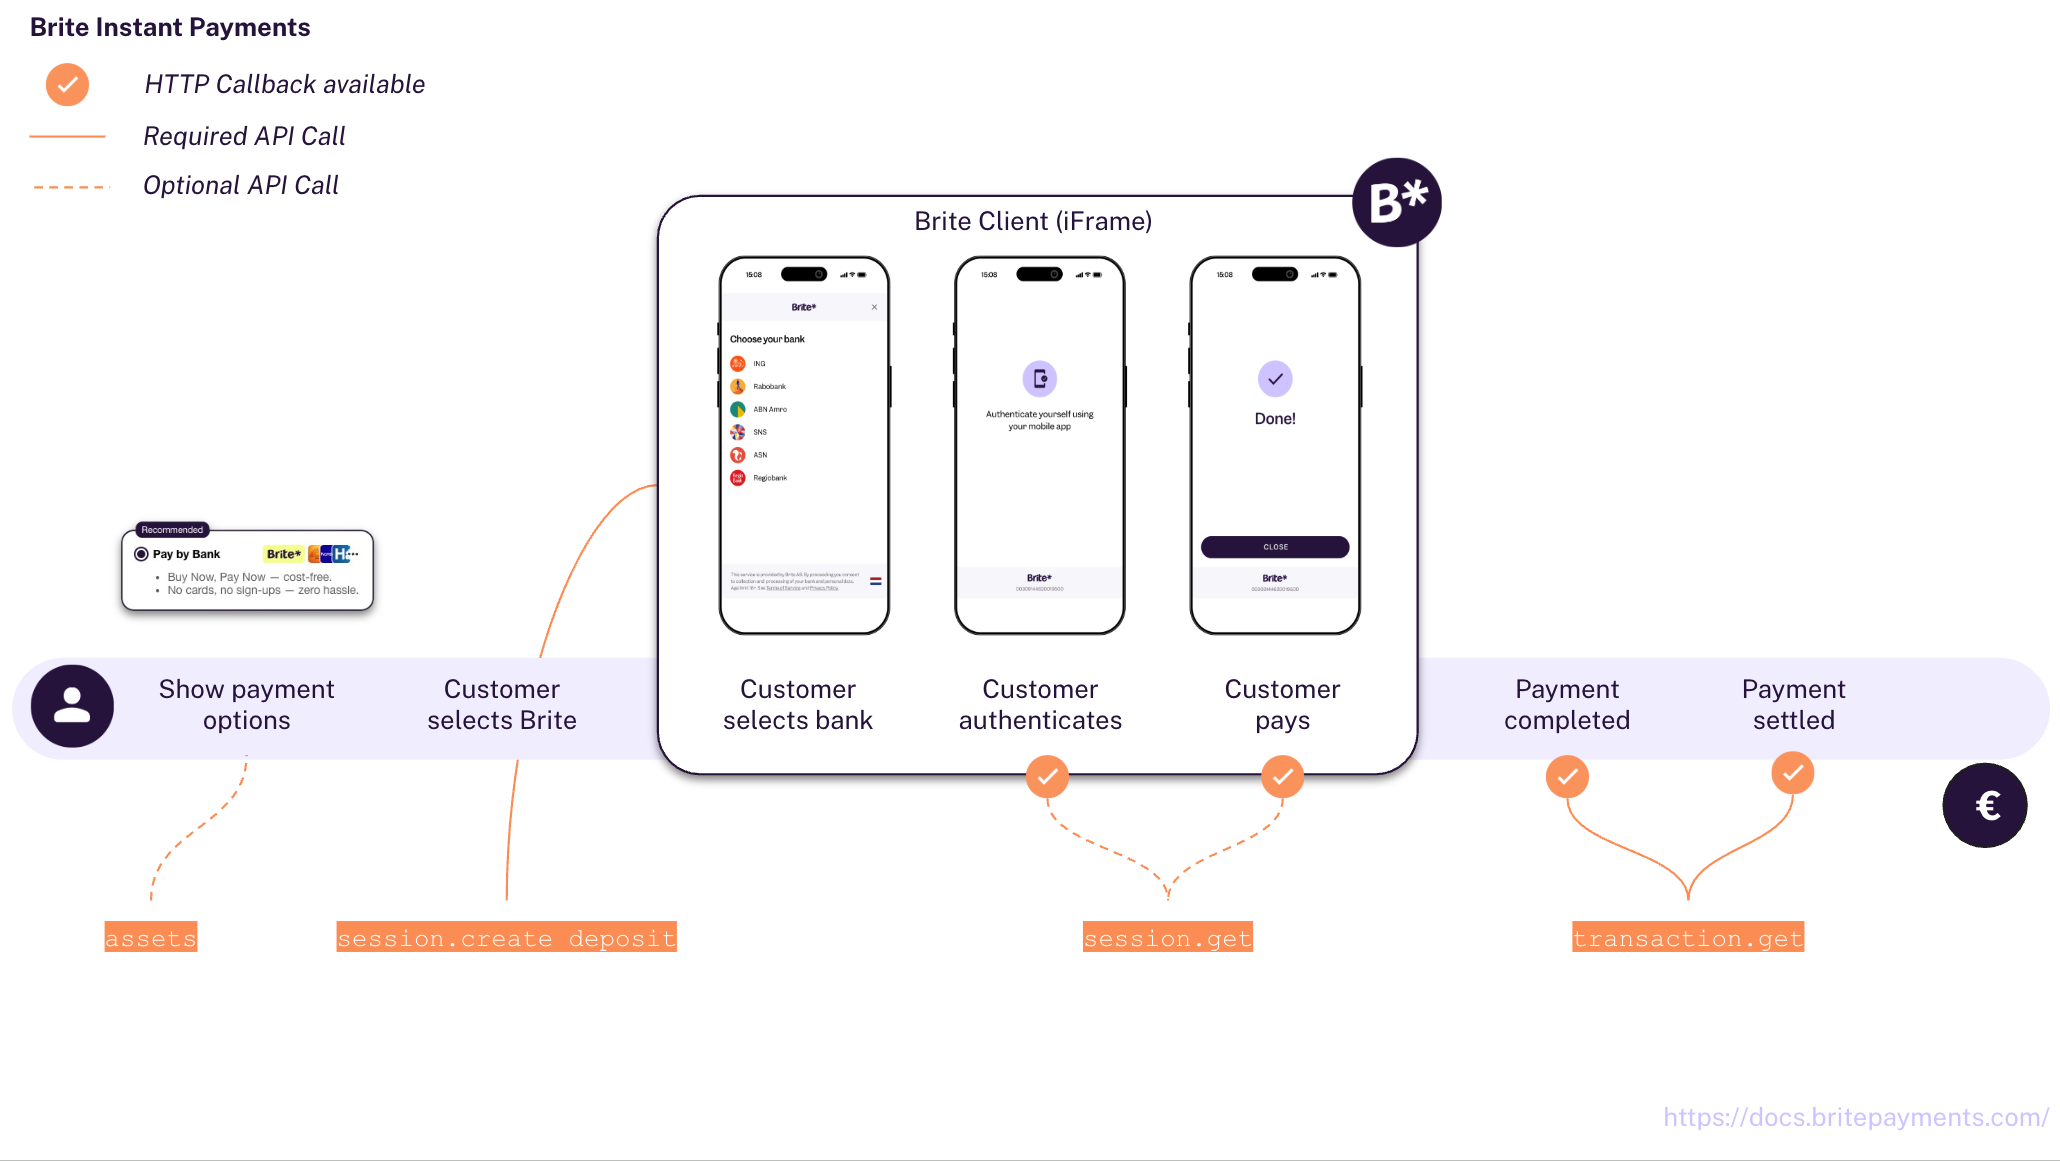
To properly process orders in your system, you must subscribe to Brite’s callback notifications.
 Important Architecture Note: Transactions are created late in the Brite session flow. If a session fails or is aborted by the user before a transaction is actually created, no transaction callbacks will be sent. Because of this, you must listen to both session notifications (to catch early failures or drop-offs) and transaction notifications (to confirm successful funding).
Recommended Implementation Logic:
Listen for Session Failures: Subscribe to session states to detect if a customer aborts the flow or fails authentication early.
Listen for Transaction Updates: Subscribe to standard transaction states (
2,3,5, and7) to handle the actual movement of funds.Verify via API: Whenever you receive a notification, always fetch the final details using
POST /api/transaction.getbefore releasing goods or updating your database.